Overview
With the FSMA 204 compliance date approaching, many large retailers and food service distributors are requiring suppliers to label pallets with Serial Shipping Container Code (SSCC) labels to streamline shipping and receiving processes at warehouse locations. Trace Exchange helps organizations meet this requirement by allowing users to generate Print & Apply style pallet labels as part of the "Record a Shipping Event" workflow.
Supported Device and Printer Setup
At this time, Trace Exchange supports two printer setup options:
- Local printing from a desktop device to a ZPL compatible printer, connected via USB cable.
- Printing over a network where a desktop device and ZPL compatible printer are connected to the same network either via ethernet cable or Wi-Fi.
Initial Setup / Configuration
To get started with pallet label printing using Trace Exchange, your organization will need to:
- Purchase a label printer and compatible label stock
- Download and configure the Zebra Browser Print software application on a desktop device
Purchasing a Printer
For pallet label printing, Trace Exchange utilizes Zebra Print Language (ZPL) technology so we highly recommend purchasing a Zebra brand printer. All Zebra printers are ZPL compatible and come highly recommended due to their industrial / rugged nature. While other printer brands may support ZPL to varying degrees, we cannot guarantee functionality with other printer brands.
The below Zebra printer recommendations are compatible with the local (desktop connected to printer via USB) and company network (printer connected via ethernet cable or Wi-Fi) label printing functionality offered in Trace Exchange:
- ZD200 Series - Offers connectivity via USB only
- ZD400 and ZD600 Series - Offers USB, ethernet and Wi-Fi connectivity
- Several other Zebra printer models also support Trace Exchange label printing functionality. If you have a different model, you will need to confirm if it has USB, ethernet/Wi-fi capability or both.
Compatible Label Sizes
Trace Exchange supports printing of both 4x2 and 4x6 pallet labels. The label size your organization should purchase will depend on customer requirements. Some customers, such as Walmart, have specific label size and format requirements that will require a 4x6 label. Other customers may only have generic pallet label requirements where only a basic SSCC pallet label is required in which case a 2x4 label is acceptable. It is recommended to verify with your customer(s) what size pallet label is required and to purchase labels based on these requirements.
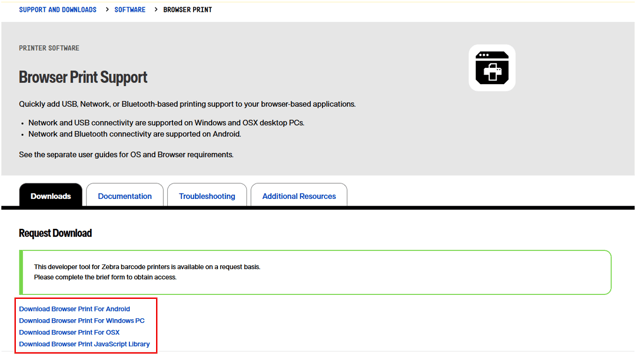
Download and Install Zebra Browser Print Application
- On the desktop device that you intend to use to print pallet labels, follow this link and download the Zebra Browser Print application. Ensure you download the appropriate version of Browser Print based on your desktop's operating system (Windows PC version for Windows devices, OSX version for Mac devices).
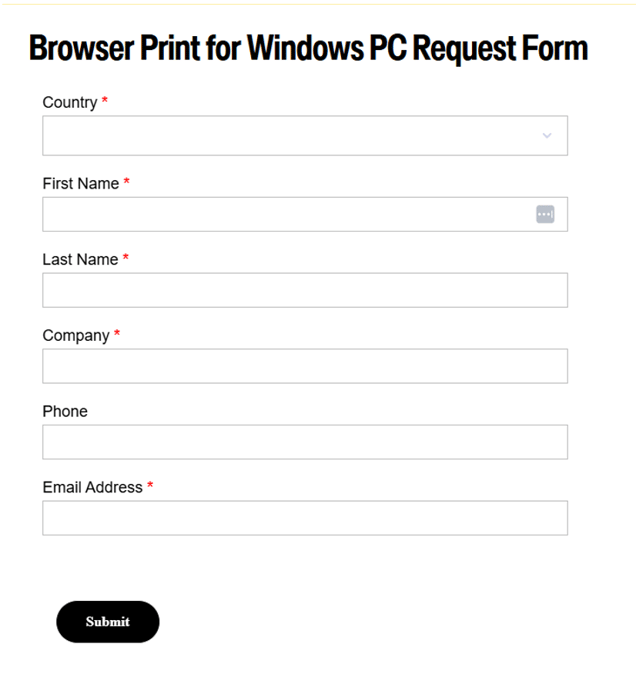
- Fill out the required contact and company information.
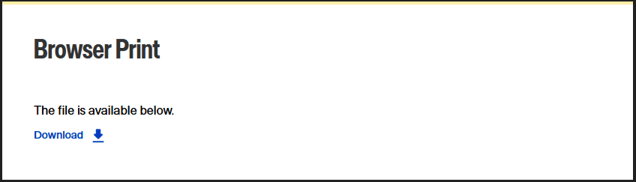
- Click the Download button. Once downloaded, run the installer to install Browser Print and open it once installed. As part of the installation/first time opening process, you may need to Accept/Allow various Permission requests when prompted.
Configure Zebra Browser Print
After opening Browser Print for the first time, you will need to configure your printer and add Trace Exchange as an Accepted Host.
Configuring your printer depends on which printer setup option you plan to use (USB vs. network).
Configuring Printer Connected via USB
- Ensure your printer is connected to your desktop device via USB cable.
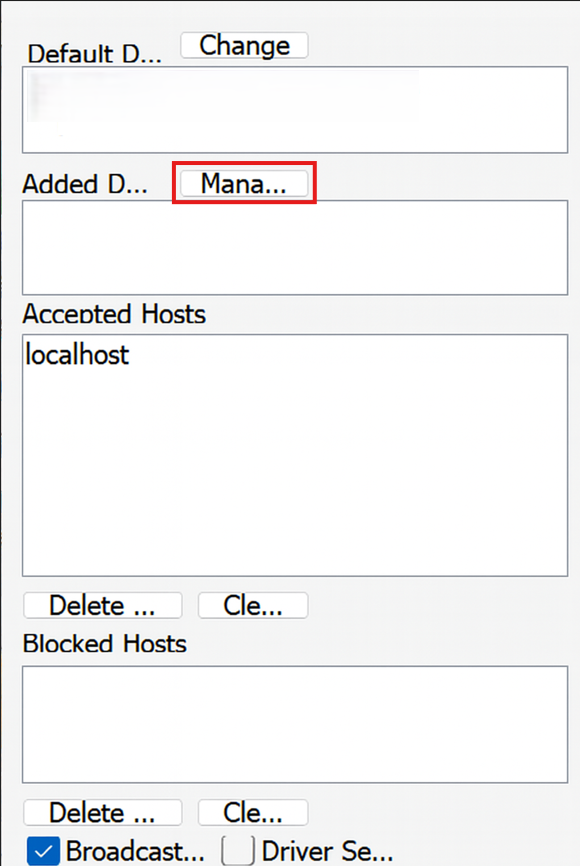
- Once connected, the printer should appear in the Default Devices window. If it's not showing up, you can click the Change button which should search for connected printer devices and display them in the Default Devices window.
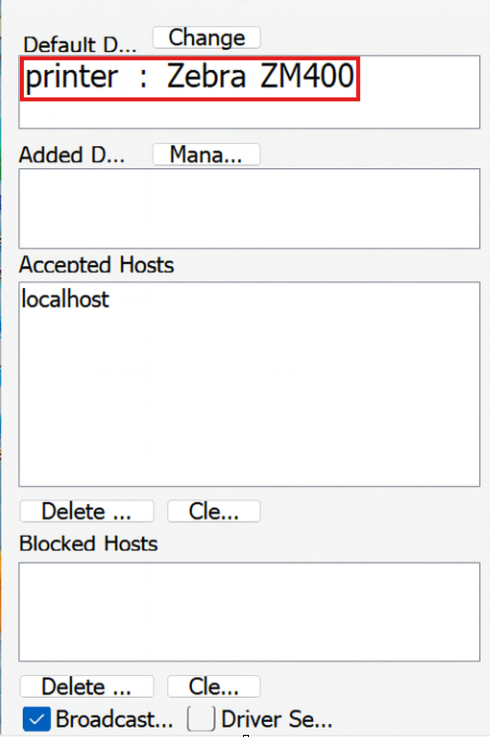
- Once you have confirmed that your connected printer is showing up in the Default Devices window, you are done configuring your printer.
Configuring Printer Connected via Network
- Ensure your printer is connected to your company network. Depending on which printer you have, you can do this either by ethernet cable or by using your printer's Wi-Fi connection functionality.
- Once your printer is connected to your company network, you will need to determine the IP address that has been assigned to your printer. All Zebra printers allow you to print a Network Configuration Page. Based on your printer model, follow one of the below steps to print a Network Configuration Page:
- Turn the printer on. Hold the Feed button until the status light flashes twice. Release the button.
- Use the printer display screen to navigate to the correct Menu option. Go to Menu > Settings > Network > Print Report / Print Configuration.
- Once you know the IP address that was assigned to your printer, in Browser Print click the Manage button above the Added Devices window.
- Fill out your Printer Name, Device Address (use the printer IP address from previous step), Port (use 9100) and then click the Add button.
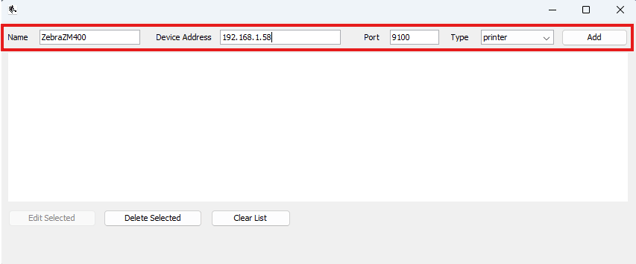
- Once you have confirmed that your connected printer is showing up in the Added Devices window, you are done configuring your printer.
Adding Trace Exchange As An Accepted Host
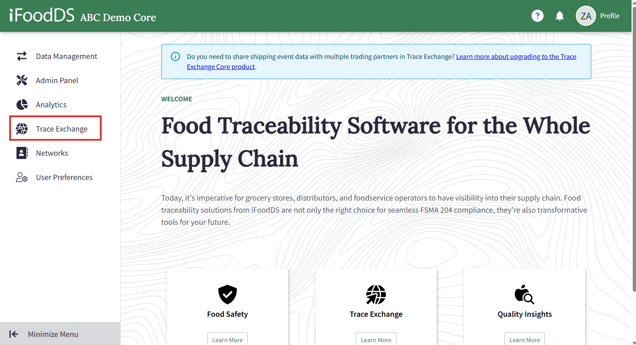
- With Browser Print running, open Trace Exchange in your web browser and sign into your account.
- Use the Trace Exchange Shipping App to create a new shipment. Ensure you add at least 1 pallet with 1 product to the shipment. You can use test data for this step.
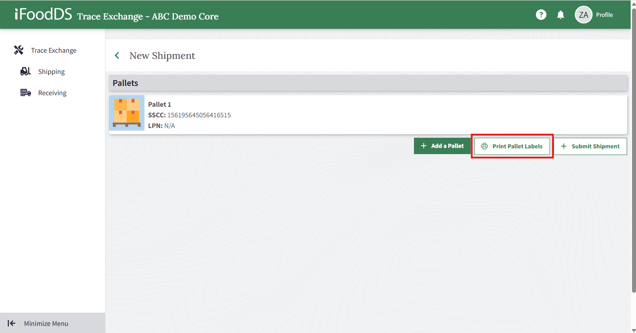
- Once on the Pallet Summary Screen, click the Print Pallet Labels button.
- A Pallet Label Configuration screen should appear as well as a web browser prompt asking to add Trace Exchange as an accepted host. Click the Yes button. If the web browser prompt does not appear immediately, try clicking the Print button on the Pallet Label Configuration screen.
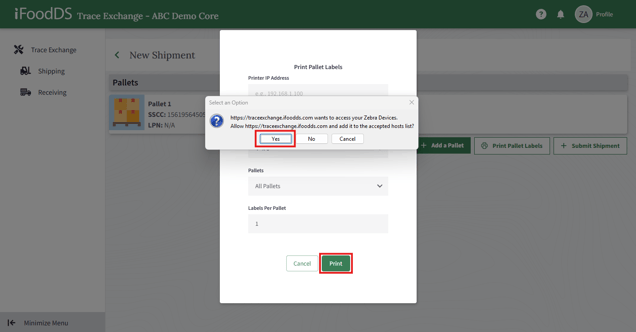
- Once you have confirmed that Trace Exchange has been added to the Accepted Hosts window, you are done configuring your Trace Exchange as an Accepted Host.
Using the Trace Exchange App to Print Pallet Labels
Congratulations! You're ready to start using Trace Exchange to print pallet labels. Before getting started, make sure:
- Your printer is turned on
- Your printer is loaded with the correct size labels
- Your printer is connected to your desktop device via USB cable or is on the company network via ethernet cable or Wi-Fi
- Zebra Browser Print is installed, configured and running on your desktop device
To print pallet labels using Trace Exchange, you will need to create a new shipment using the Trace Exchange Shipping App.
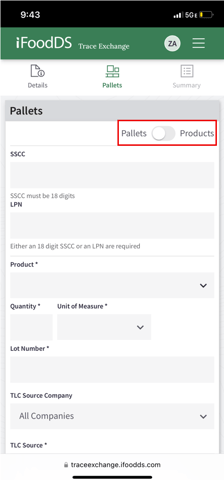
- Follow the steps to record a new Shipment found here. When adding products to your shipment, ensure that the slider in the top right corner of the Product Details page is set to Pallets. This allows you to enter pallet SSCC information for each pallet.
- From the Pallet Summary Screen, click the Print Pallet Labels button.
- On the Pallet Label Configuration screen, ensure your printer is selected and designate your preferred label size, which pallets you need labels for and number of labels per pallet. When ready, click the Print button.
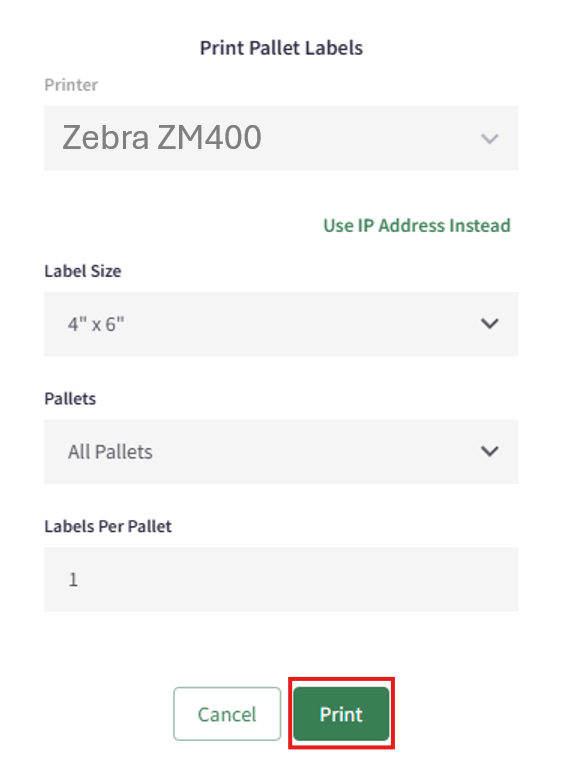
- Your printer should now print all designated pallet labels.